Once you've configured your folder using the PPC Keyword Tool, the next step is populating your campaigns with keywords and organized ad groups.
Adding keywords and grouping them properly boosts relevance and can improve your return on ad spend (ROAS). Whether you’re importing your own list or building from Semrush, this part of the setup is where your paid strategy comes to life.
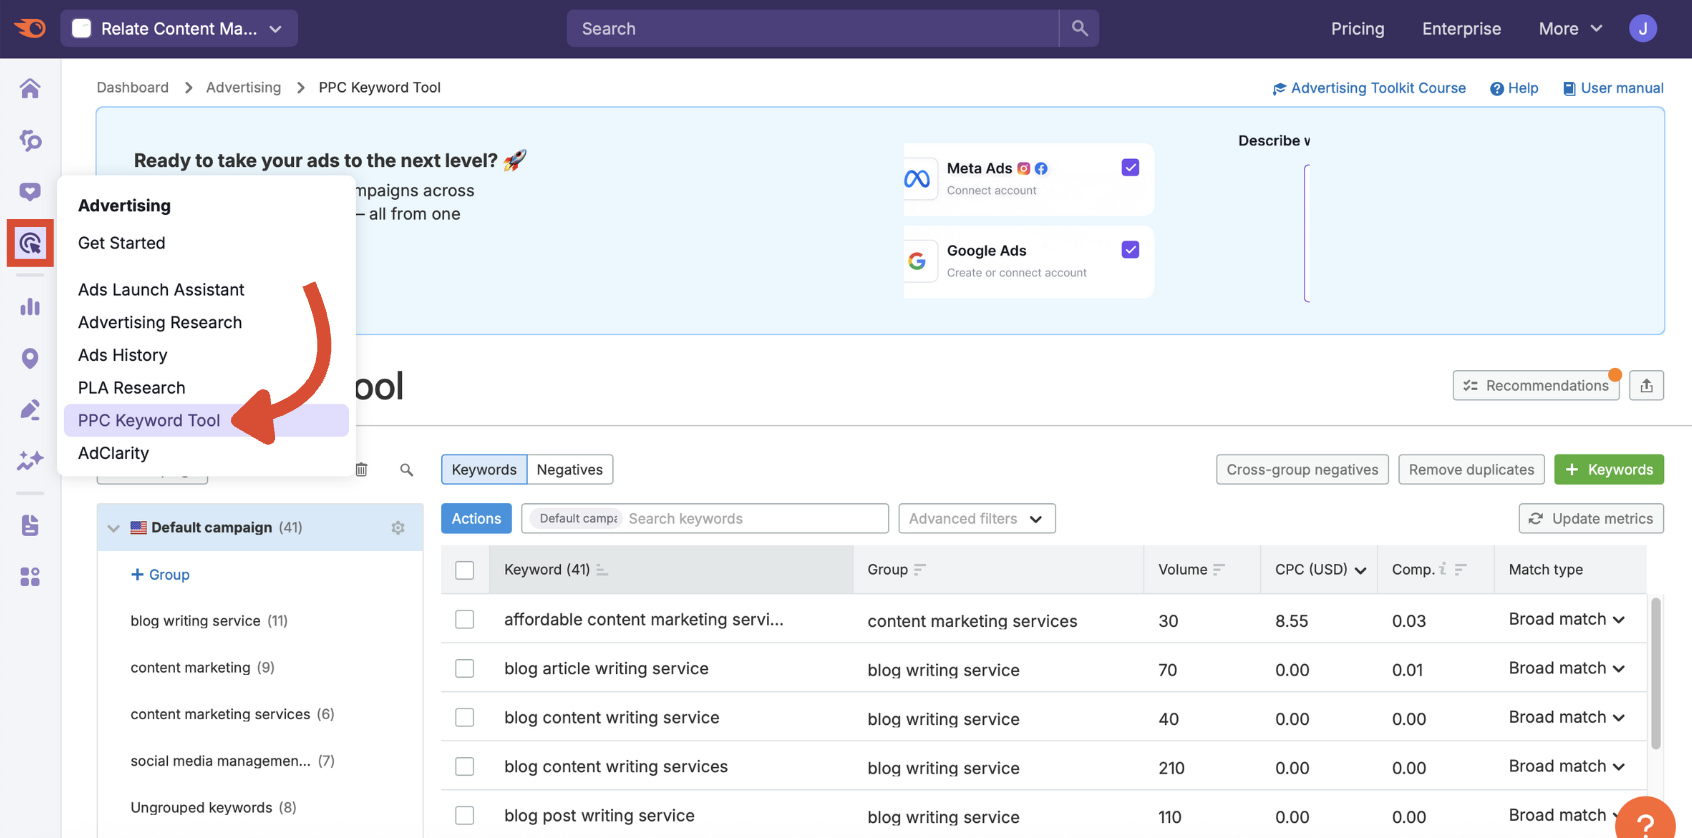
To access the PPC Keyword Tool, open the Semrush side menu, click the Advertising icon, and select PPC Keyword Tool from the list.
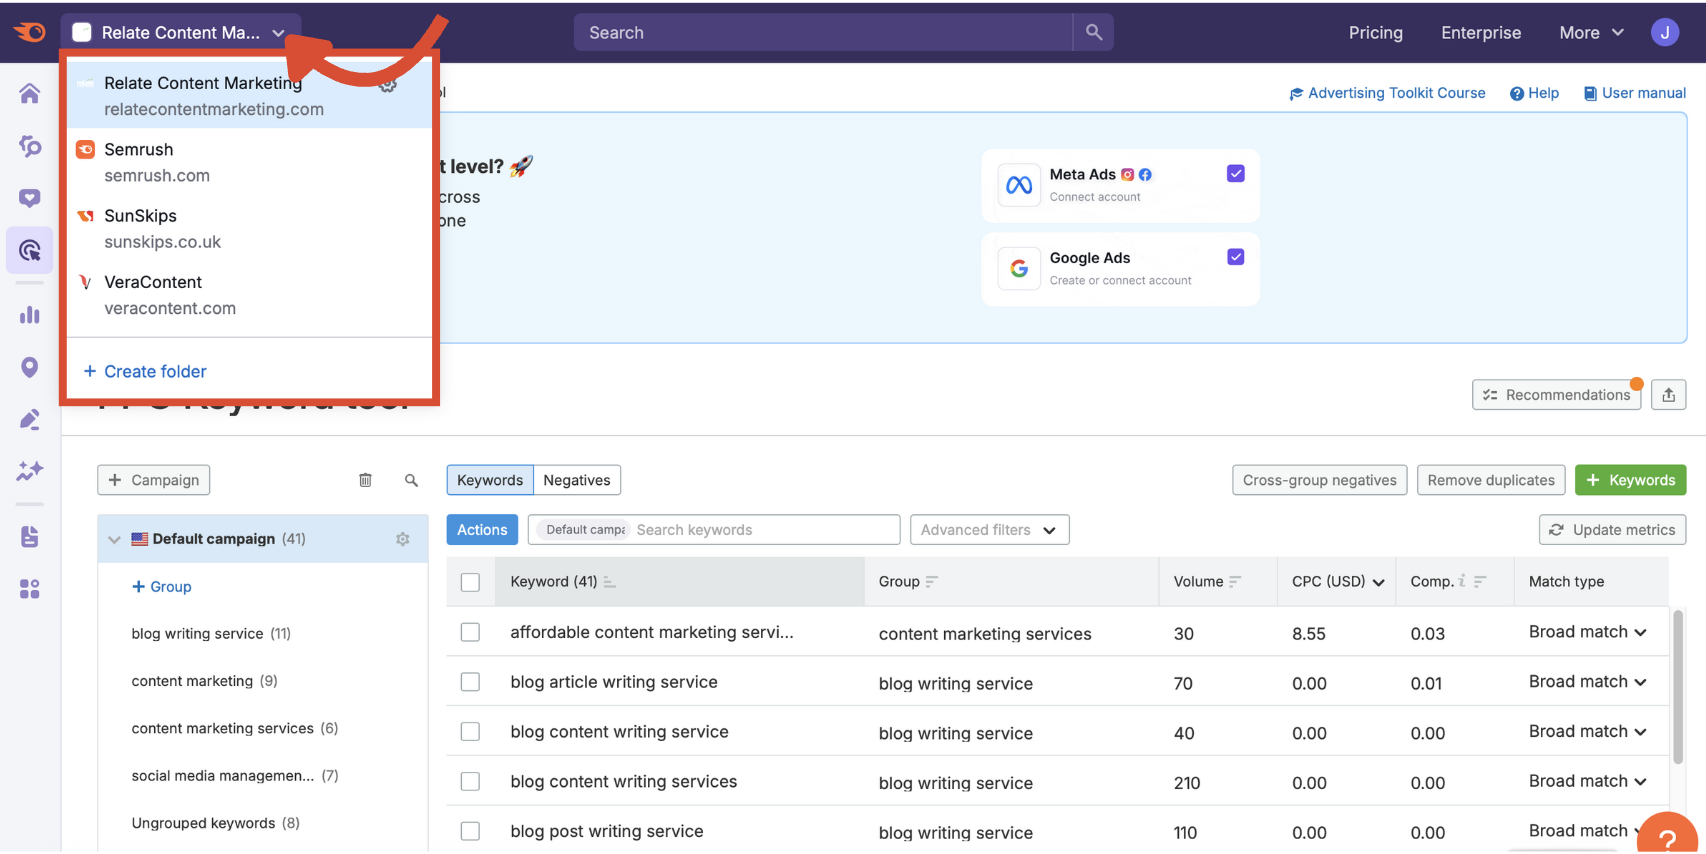
Make sure you have the right folder selected in the drop-down menu at the top.
Step 1: Adding Keywords
Click the green + Keywords button to bring up the options for adding keywords.
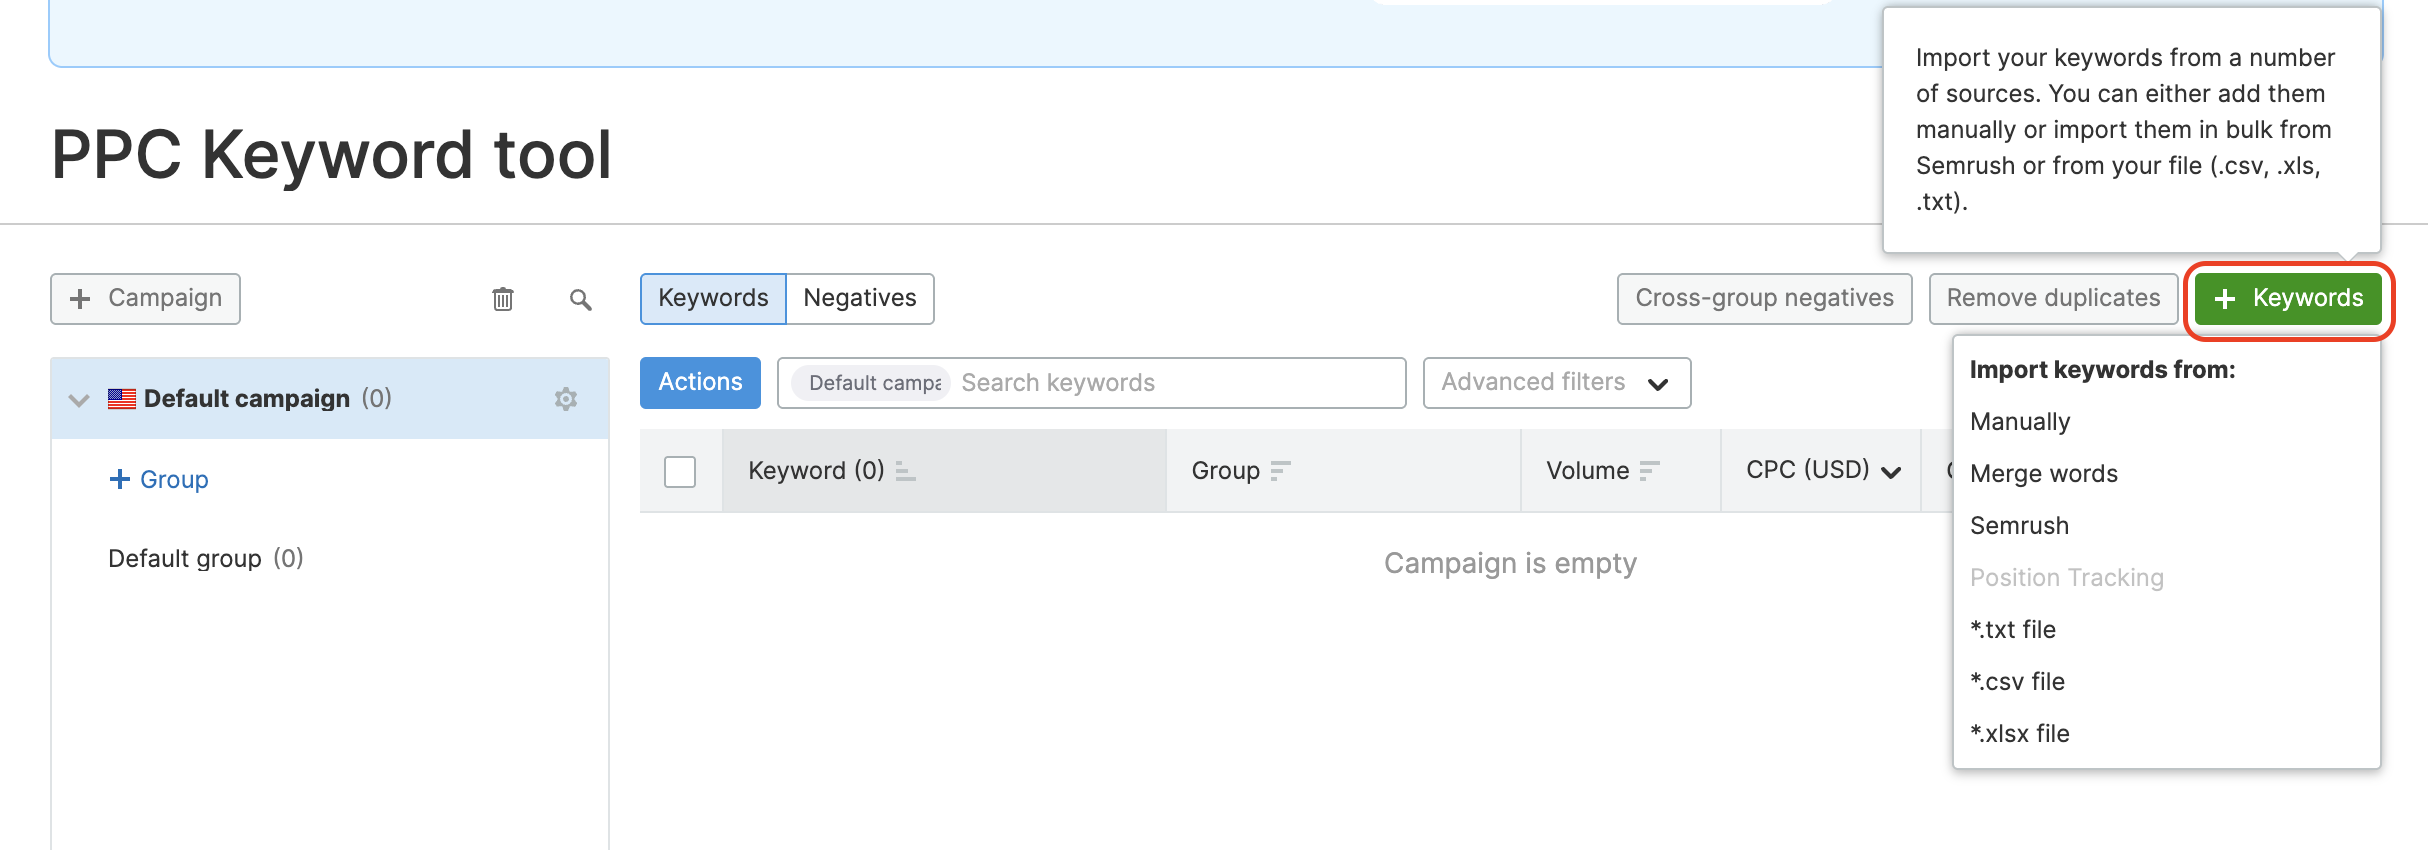
Manual Entry
Type or paste your keywords into the box.
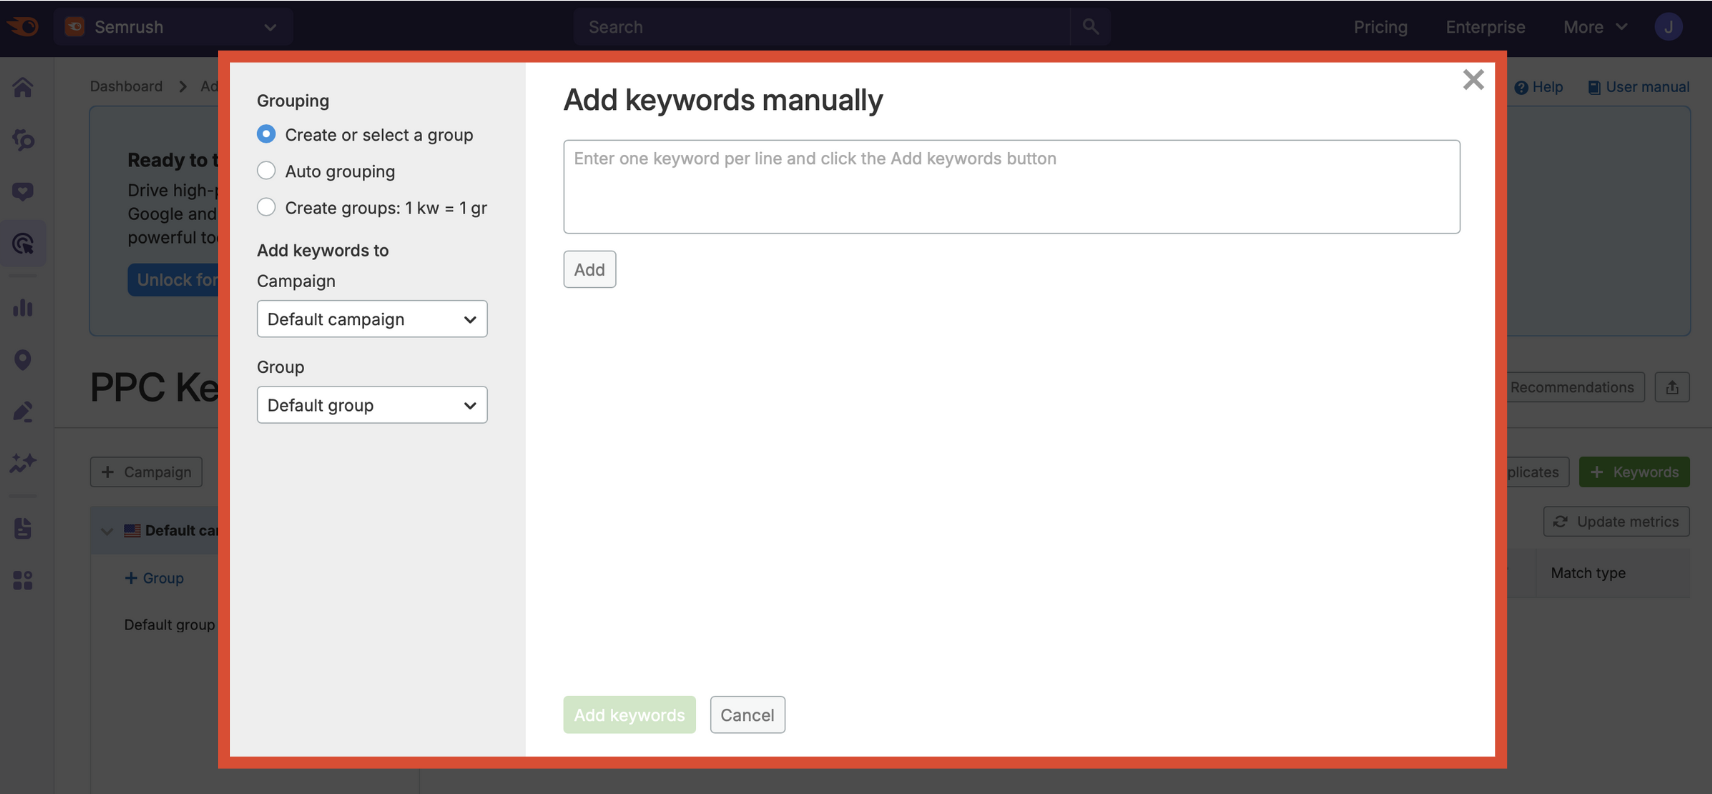
From here you can:
- Assign the new keywords to an existing group or create a new one for them
- Let Semrush auto-group them for you
- Create a new group for each keyword in the list
Merge Words
Combine terms across three columns into new long-tail phrases. For example, you can quickly generate location-based keywords by pasting your list of regions, followed by your product/service in the second column, then additional words like “service” or “agency” in the third.
Paste one keyword per line in each box and click Merge words.
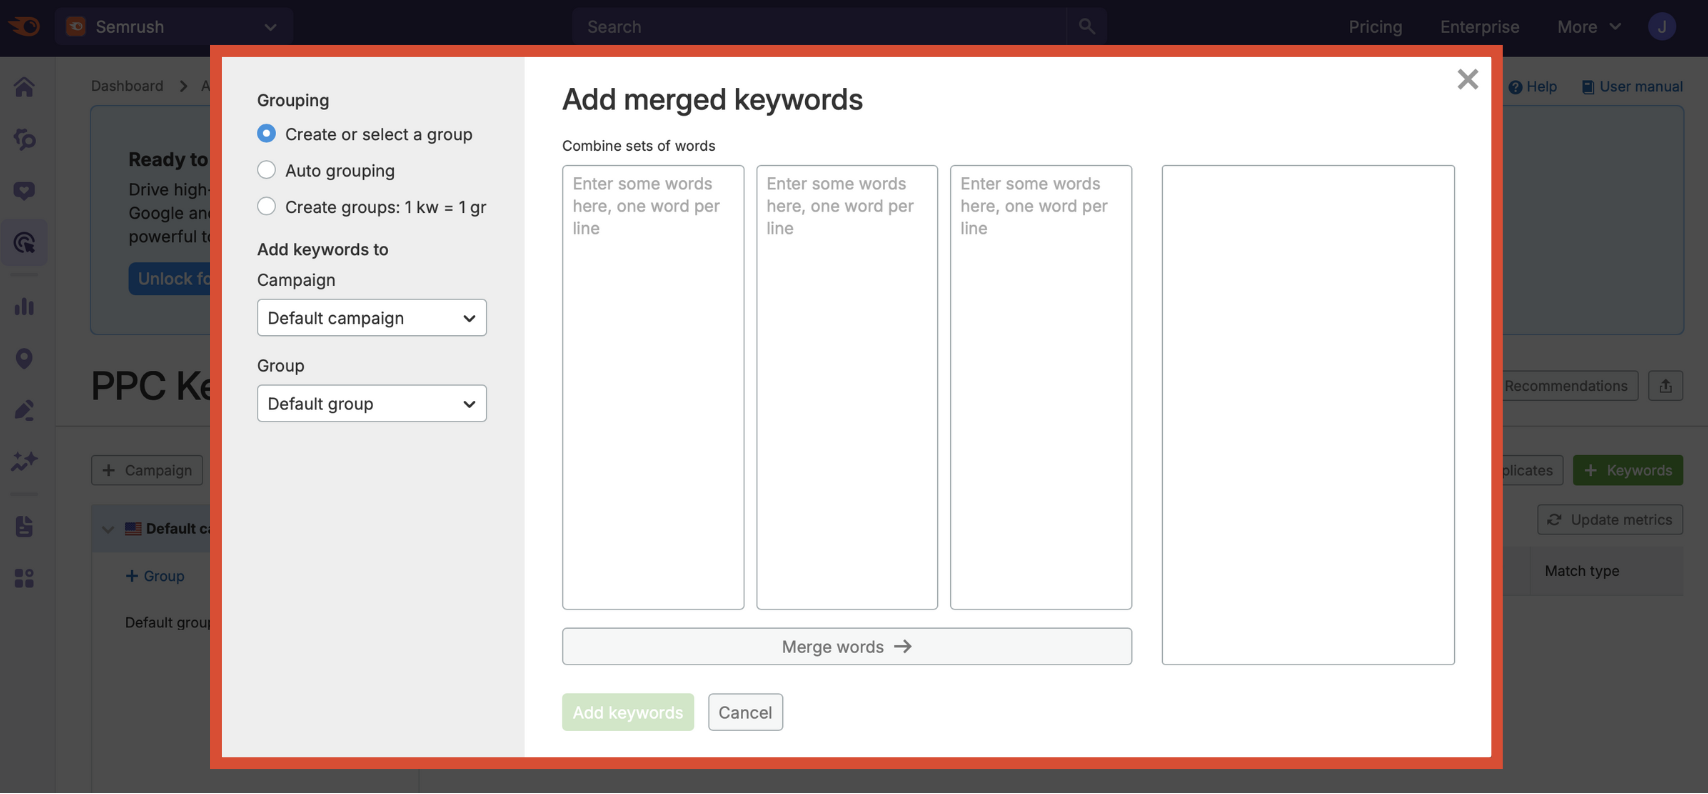
Again, you have three options for assigning these keywords to groups with minimal effort.
Semrush
If you’re building a campaign from scratch, importing keywords from Semrush is a fast way to build well-organized campaigns and keyword groups.
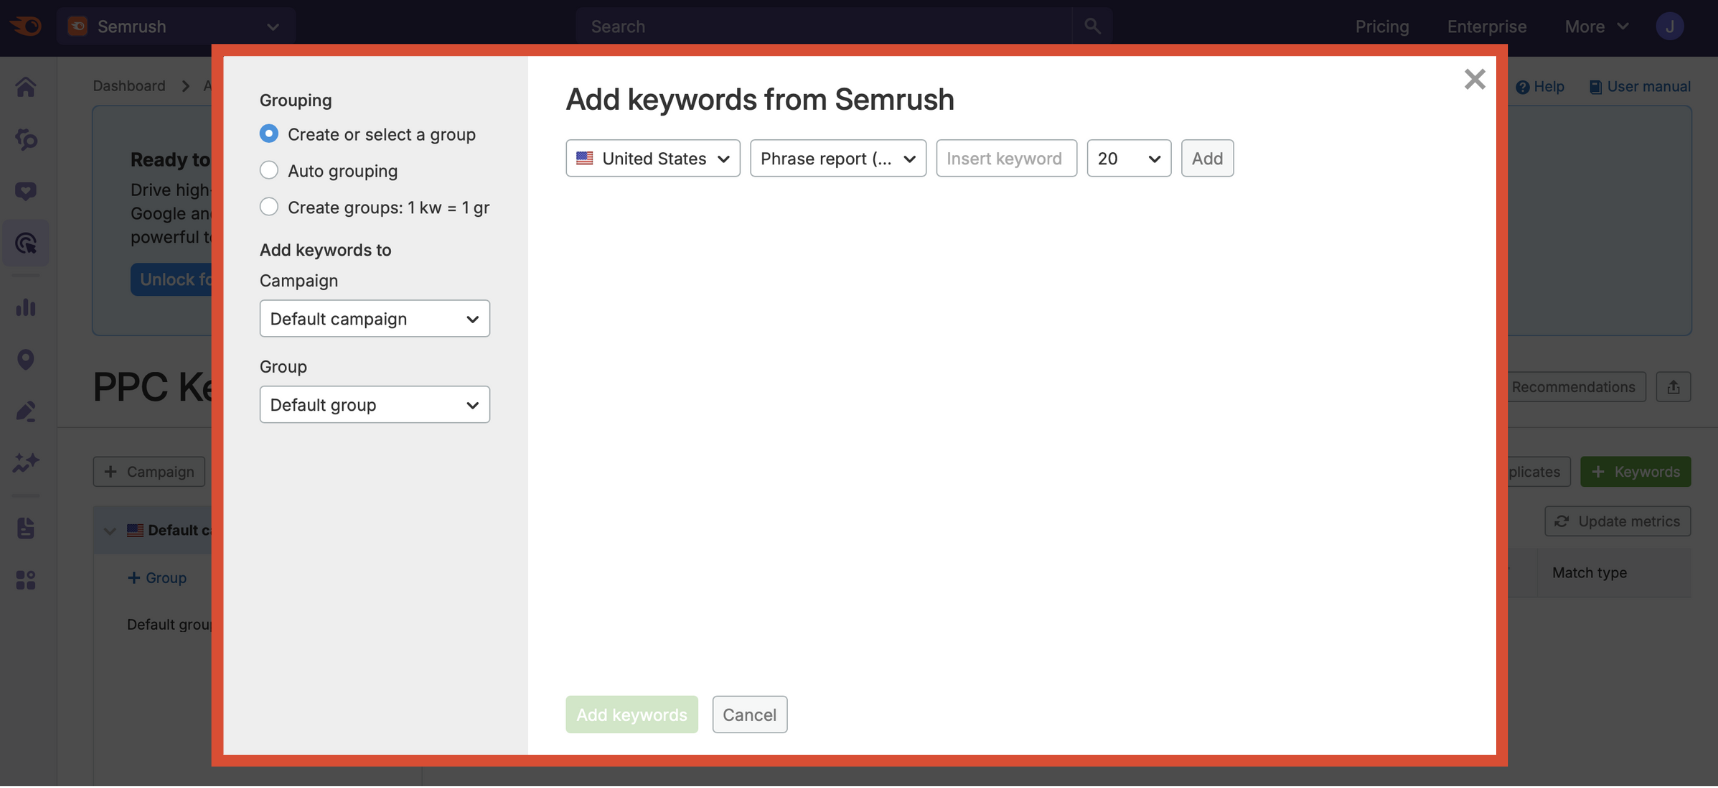
Start by selecting your target country on the left. Then choose a source from the drop-down menu next to it. You’ll find five report types to choose from:
- Domain report (organic) pulls keywords a domain ranks for organically
- Domain report (paid) pulls keywords the domain targets with Google Ads
- Phrase report (phrase related) includes terms that are contextually similar to your keyword, even if they don’t include the exact phrase
- Phrase report (phrase match) gives you all keywords that contain your chosen keyword as part of a longer phrase
- Google related searching scrapes terms from the “Related Searches” section of the Google search results page
Finally, choose how many terms to bring in from the drop-down and click add. Semrush will populate keyword suggestions which you can then assign to a group or refine further.
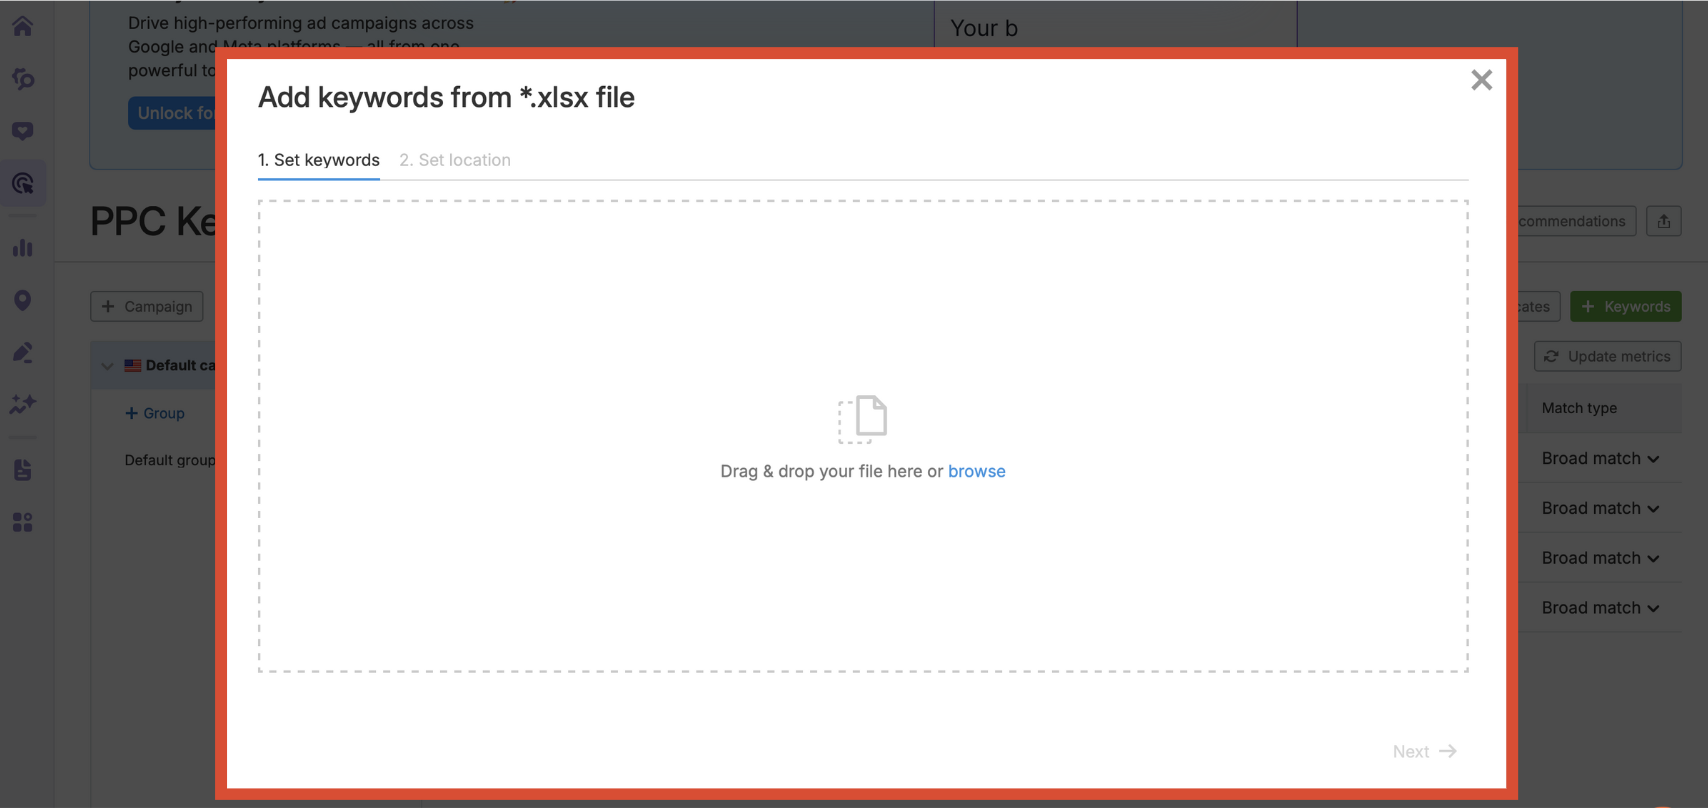
File Upload
Drag and drop or browse to upload a .TXT, .CSV, or .XLSX file with your keyword list. Each line should contain a single keyword.
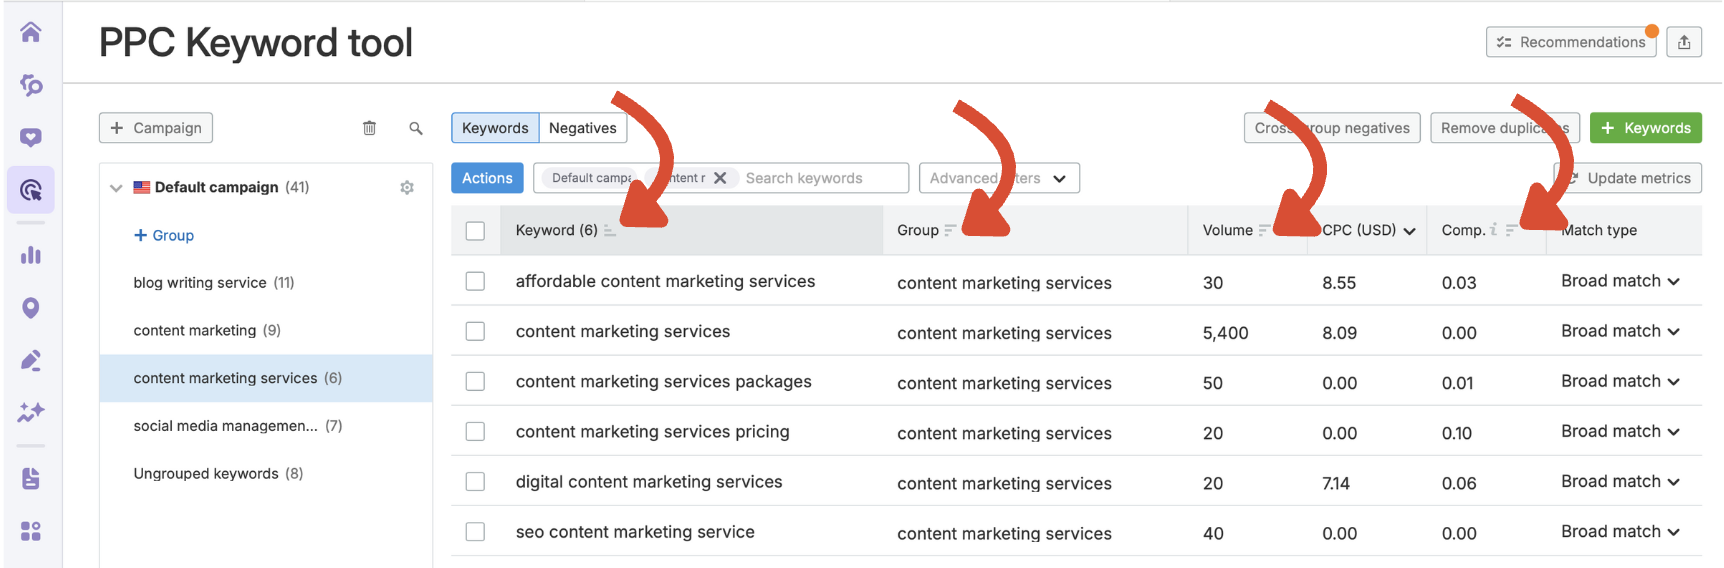
Step 2: Understanding Keyword Table Metrics
Each keyword you add will be displayed in the campaign table with helpful data to guide your decisions.
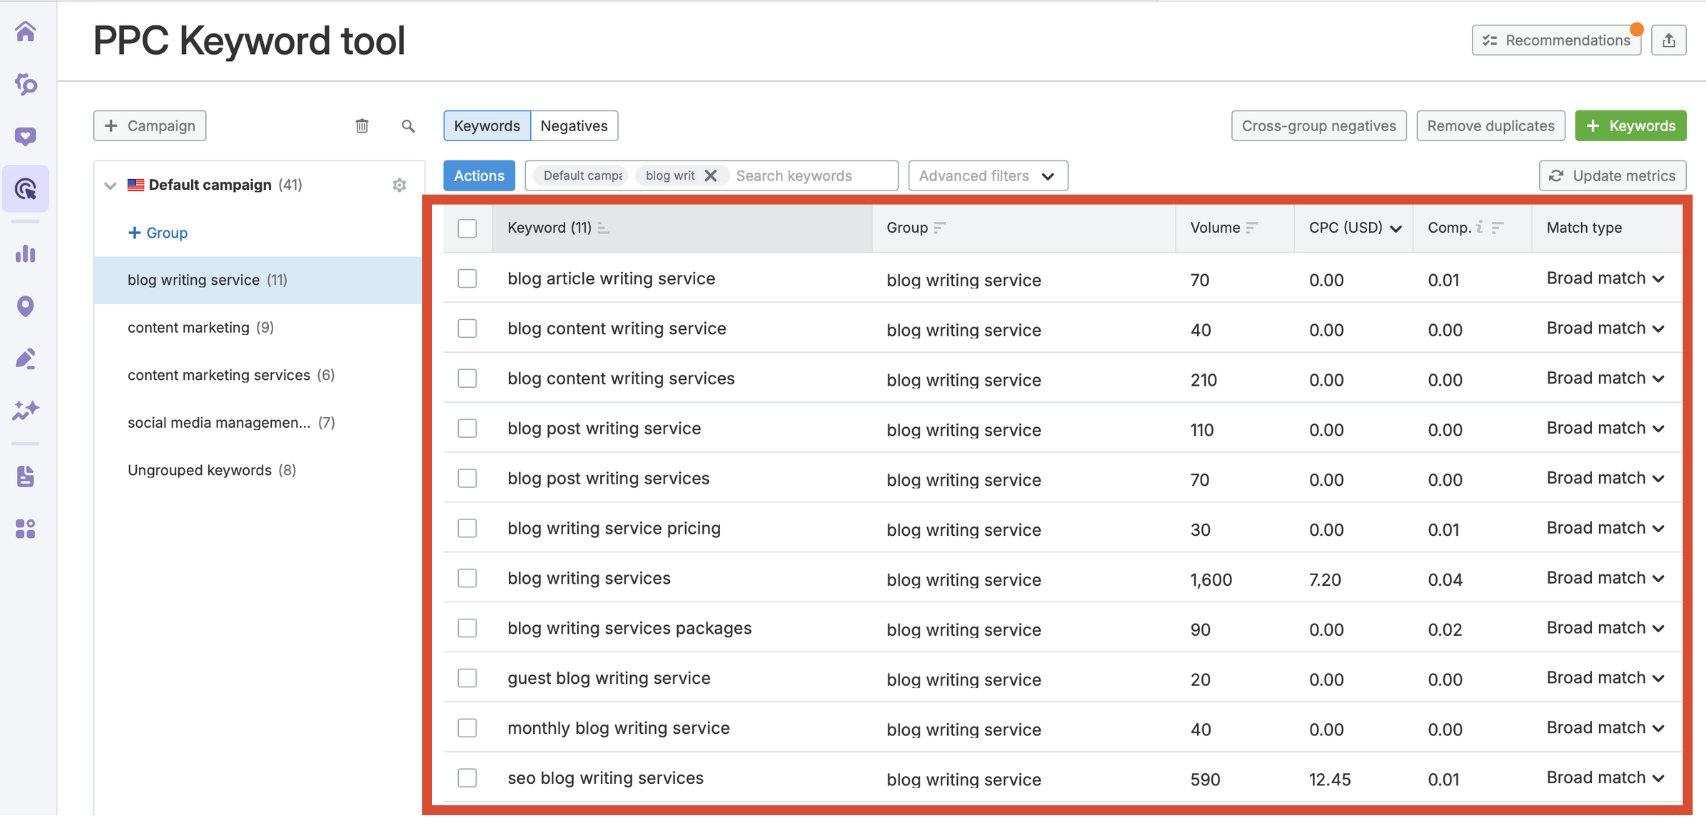
Here’s what each column means:
- Keyword: The term you’re targeting
- Group: The assigned ad group for this keyword
- Volume: Estimated average monthly search volume (based on campaign location)
- CPC: Average cost-per-click. Helps you budget and forecast spend.
- Comp: Competitive density in the ad auction on a scale of 0 to 1 (higher means more advertisers are bidding)
- Match type: Displays which match type is currently assigned (broad, phrase, exact, or modified broad). You can edit this directly in the table.
Match types define how closely a user’s search must match your keyword before your ad shows.
- Broad match: Your ad may appear for searches that include your keyword in any order, plus synonyms and related terms. This offers the widest reach, but may show for less-relevant queries.
- Phrase match: Your ad will appear for queries that include your keyword phrase in the exact order, though it may include words before or after it. Use this for moderate targeting with slightly broader reach than exact match.
- Exact match: Your ad will only appear when someone searches for your exact keyword or very close variants. This offers the highest precision and helps control budget but reaches fewer users.
- Modified broad: This option is being phased out by Google Ads, but when available, it lets you specify that certain words in your keyword must be included in the search. It strikes a middle ground between broad and phrase match.
Use the toggle above the table to switch between targeted keywords and negatives.
Step 3: Creating and Managing Ad Groups
Once your keywords are imported, it’s time to properly organize them into groups (you may have already started or completed this phase at the point of import).
Grouping your keywords strategically improves your ad performance and simplifies campaign management. Focused ad groups help align ad copy with searcher intent, reduce wasted spend, and improve Google Ads Quality Scores.
Create Groups
Click + Group in the left sidebar to create new ad groups or click the edit icon to rename an existing one.
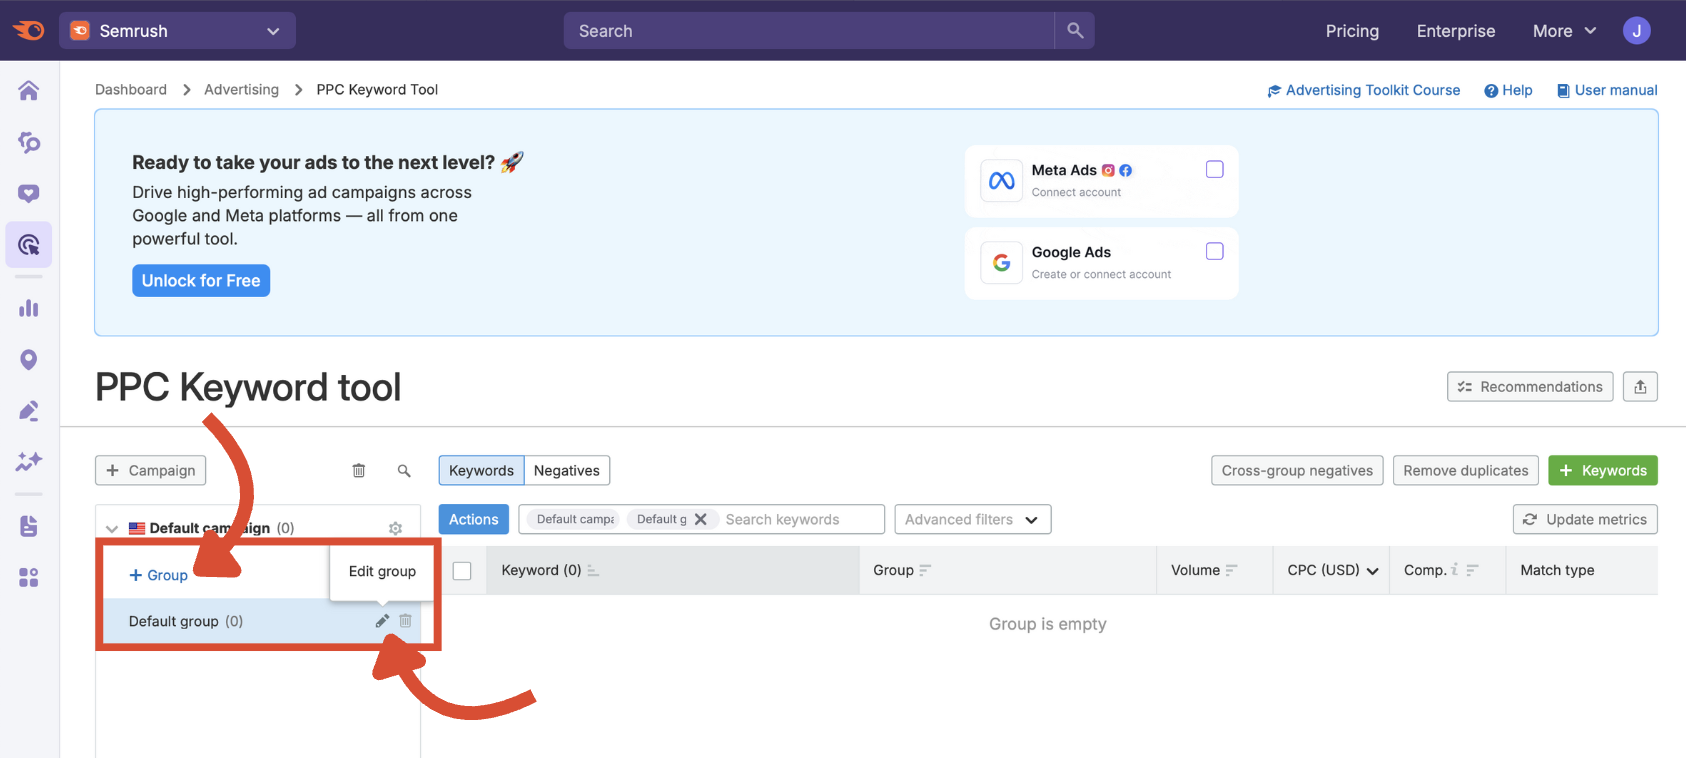
Keep each group tightly themed for better relevance and a higher Quality Score.
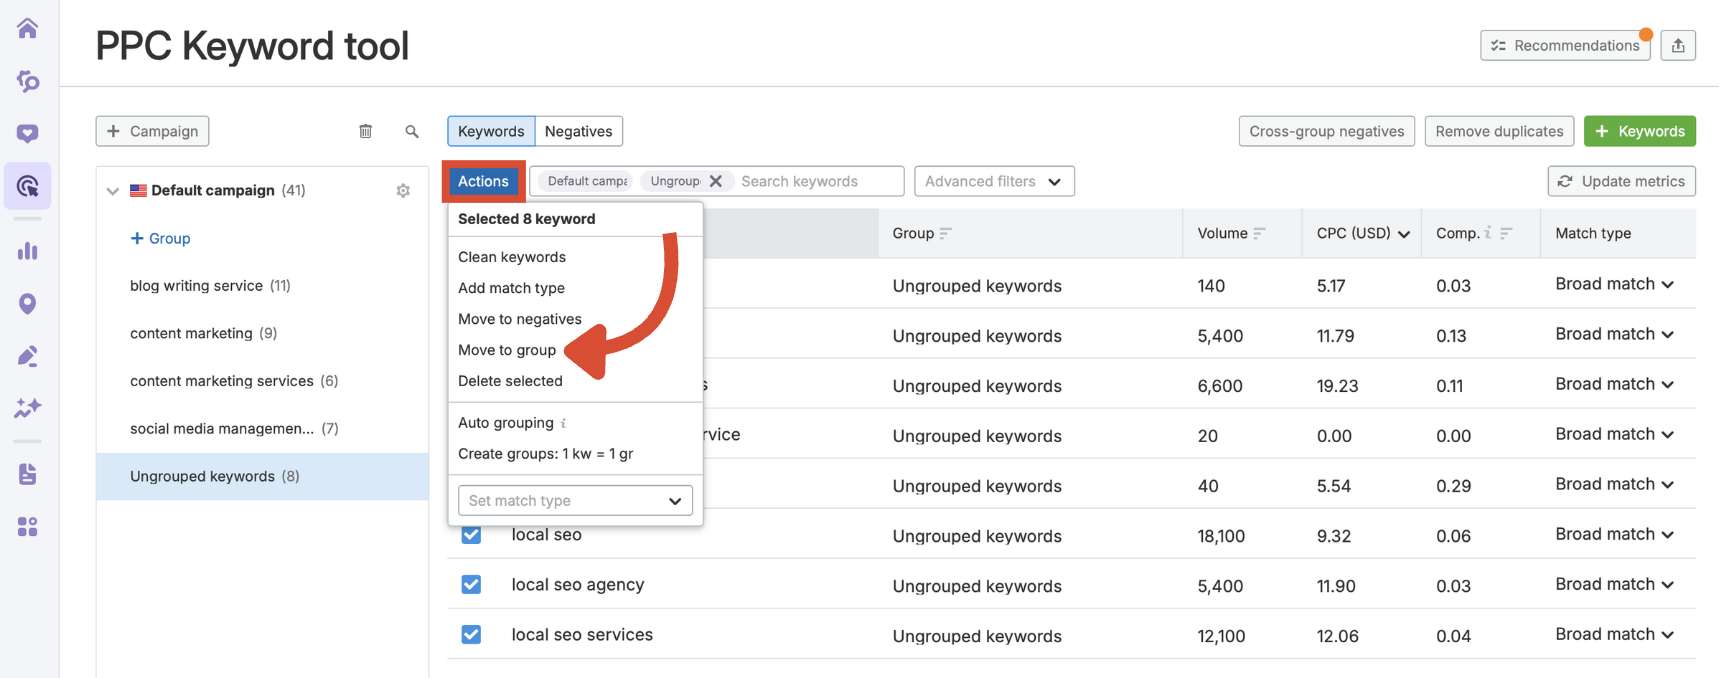
Move Keywords to Groups
Select keywords using the checkboxes. Then, click Actions, then Move to group, and assign them to the desired group.
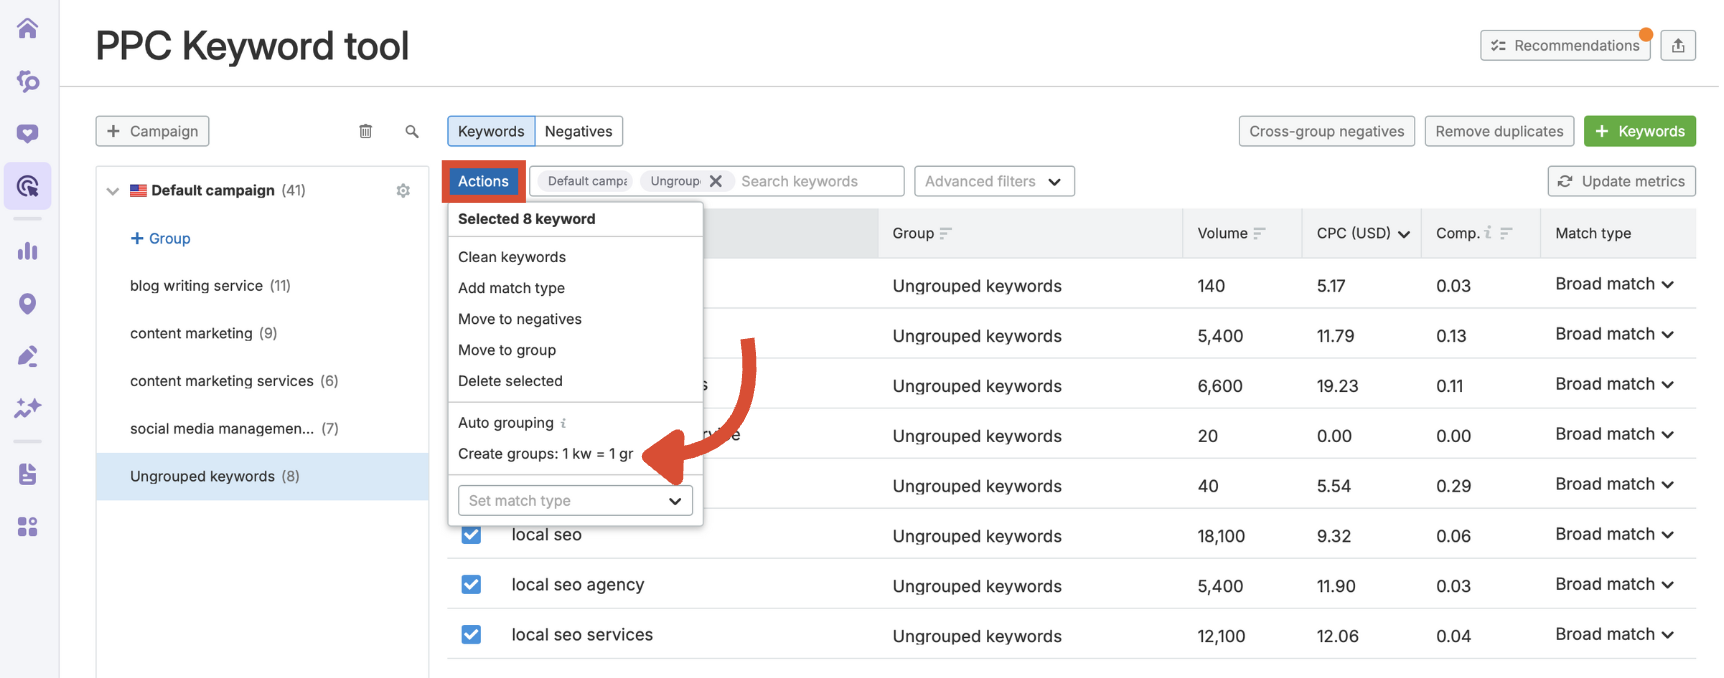
Auto Grouping
Use the Auto grouping function to automatically organize keywords by shared qualities.

Create Groups: 1 kw = 1 gr
Select keywords and choose 1 kw = 1 gr from the actions menu. This tactic improves control and relevance.
Clean Keywords
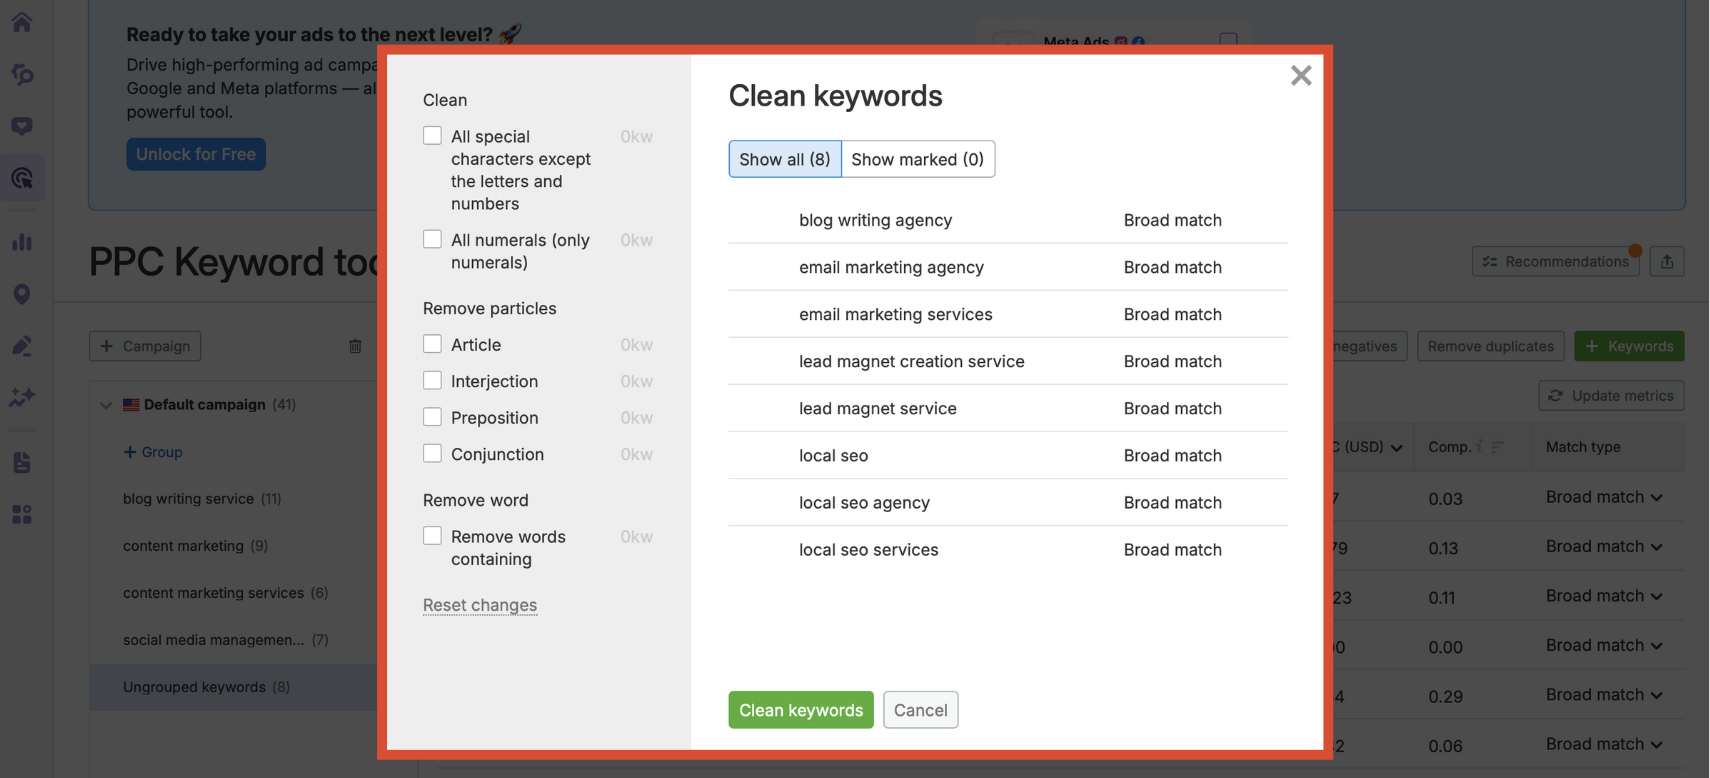
With keywords selected, click the Actions button, then select Clean keywords to open the cleaning options.
You’ll see options to clean up your list by removing:
- Special characters
- All numerals
- Articles (like "the", "a")
- Interjections
- Prepositions
- Conjunctions
You can also remove specific word patterns. This keeps your keyword list precise and relevant.
Add Match Type
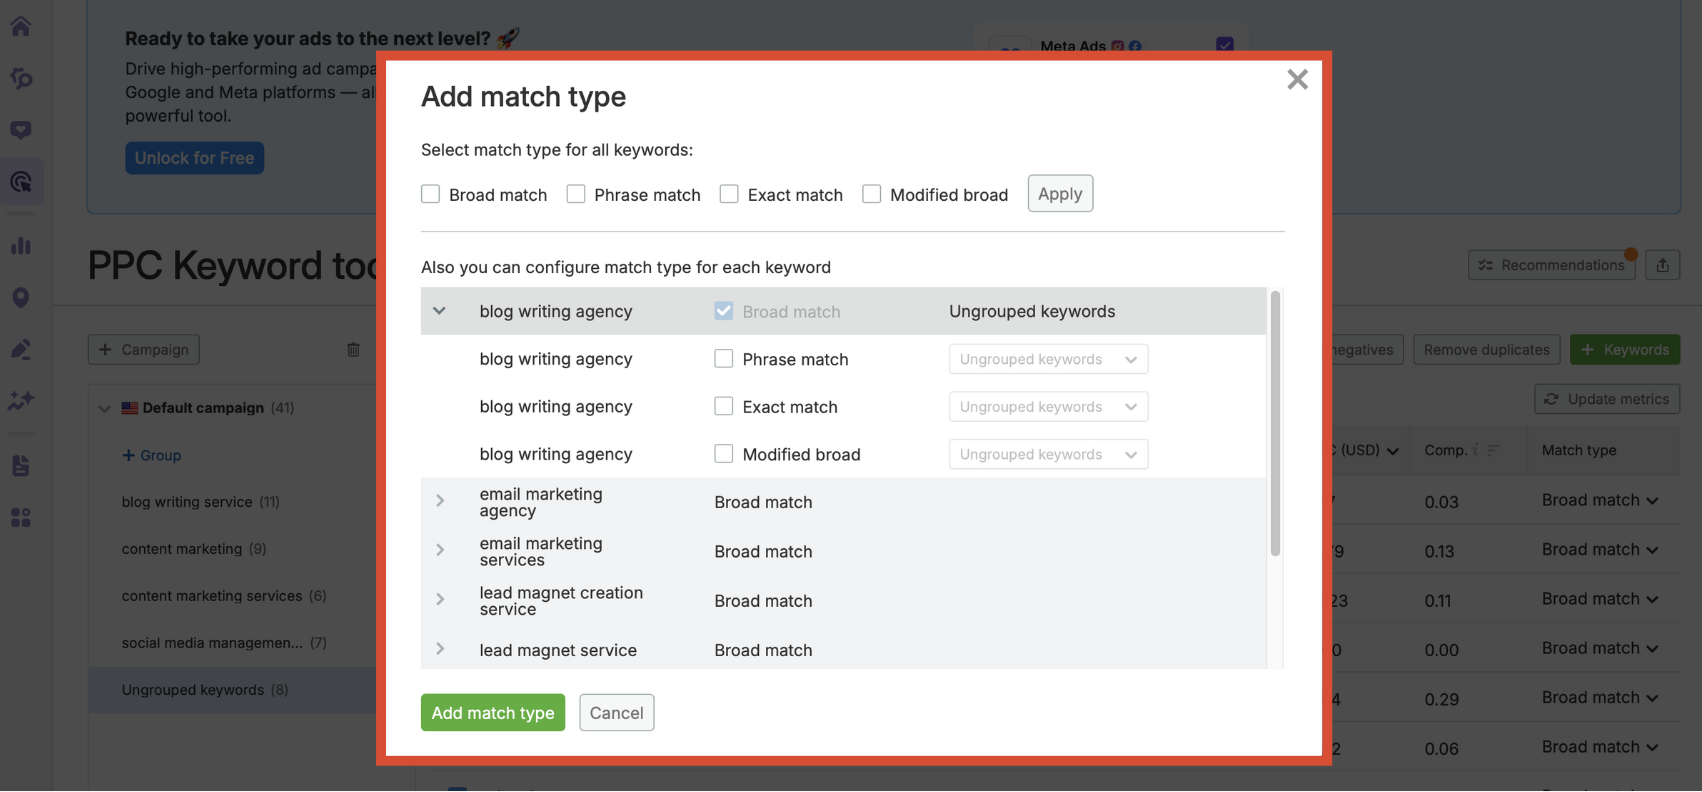
Click the Actions button and select Add match type to open the configuration window. Here, you can:
- Apply one match type across all keywords (broad, phrase, exact, or modified broad)
- Or set a different match type per keyword using the checkboxes
Move to Negatives
If certain keywords are irrelevant, underperforming, or likely to trigger the wrong intent, you can turn them into negative keywords.
Select the keywords using the checkboxes, click the Actions button, and choose Move to negatives from the dropdown.
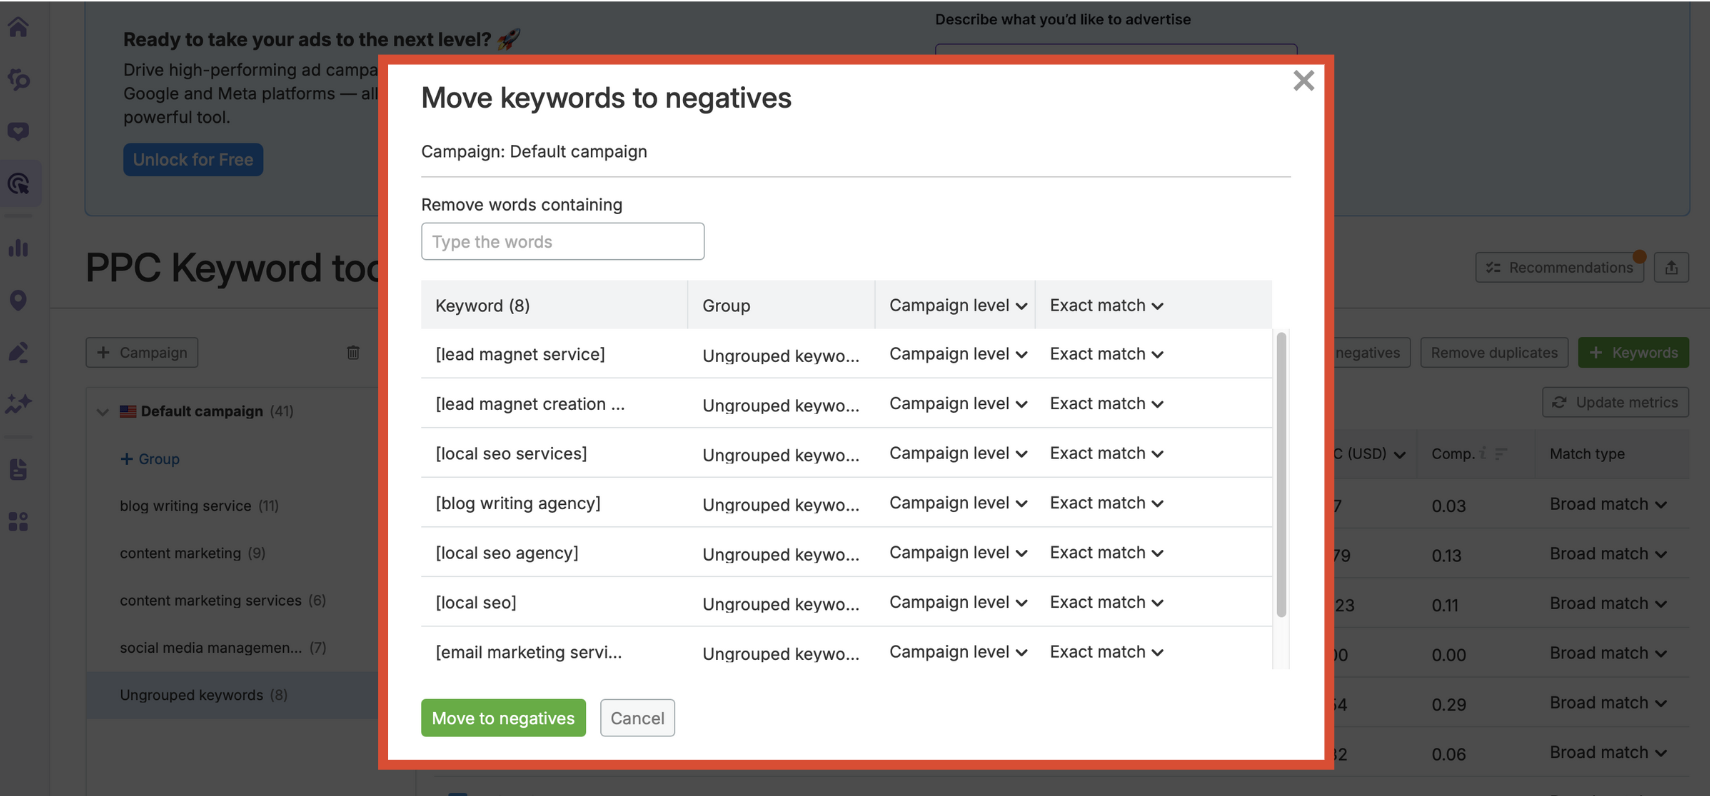
Review the keywords being moved, select the campaign or group level, and set the match type for your negatives (broad, phrase, exact, or modified broad). You can also remove words containing a specific term using the filter bar at the top.
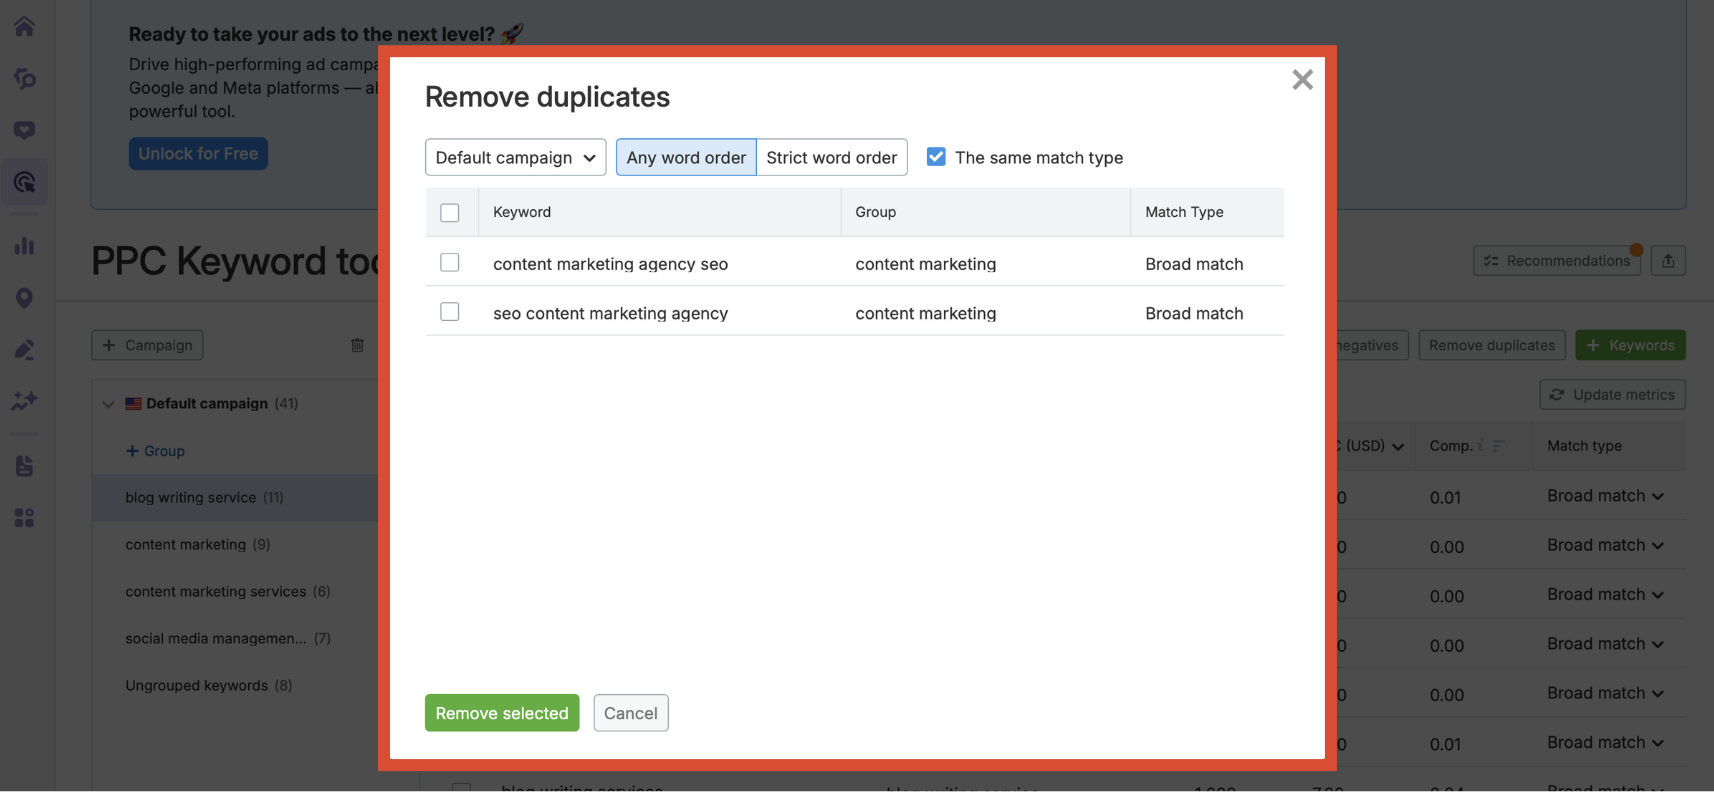
Remove Duplicates
Duplicate keywords can create confusion, waste budget, and dilute your ad group performance. The Remove duplicates button quickly identifies and eliminates repeated keywords across your campaign.
Click the button above your keyword table to open the duplicate cleaner.
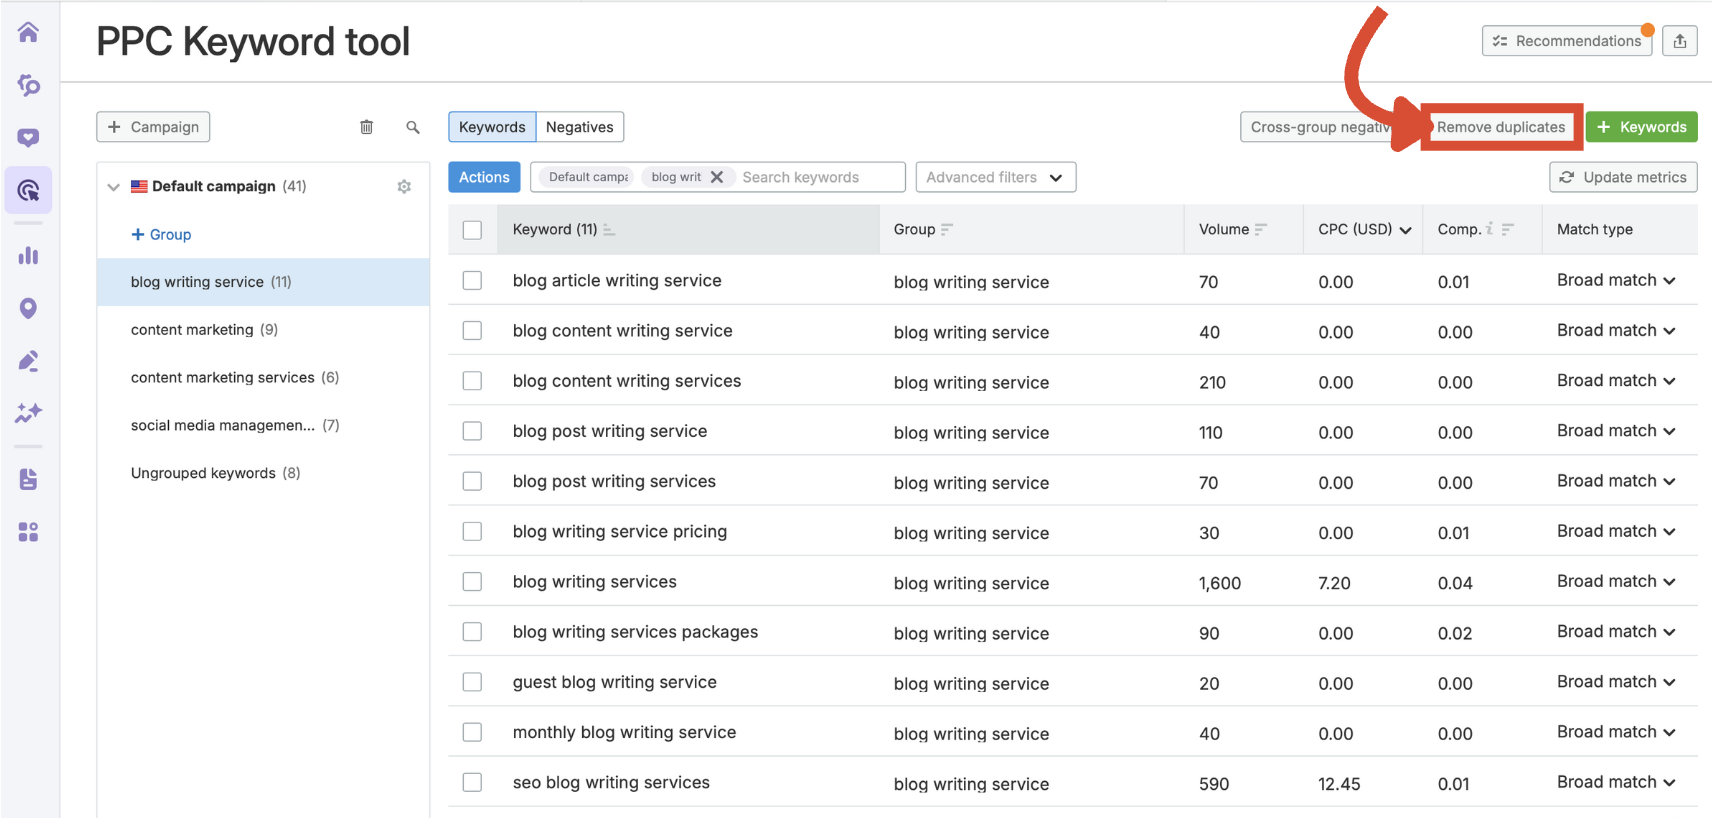
You’ll get a list of any overlapping terms, which you can review before confirming removal.
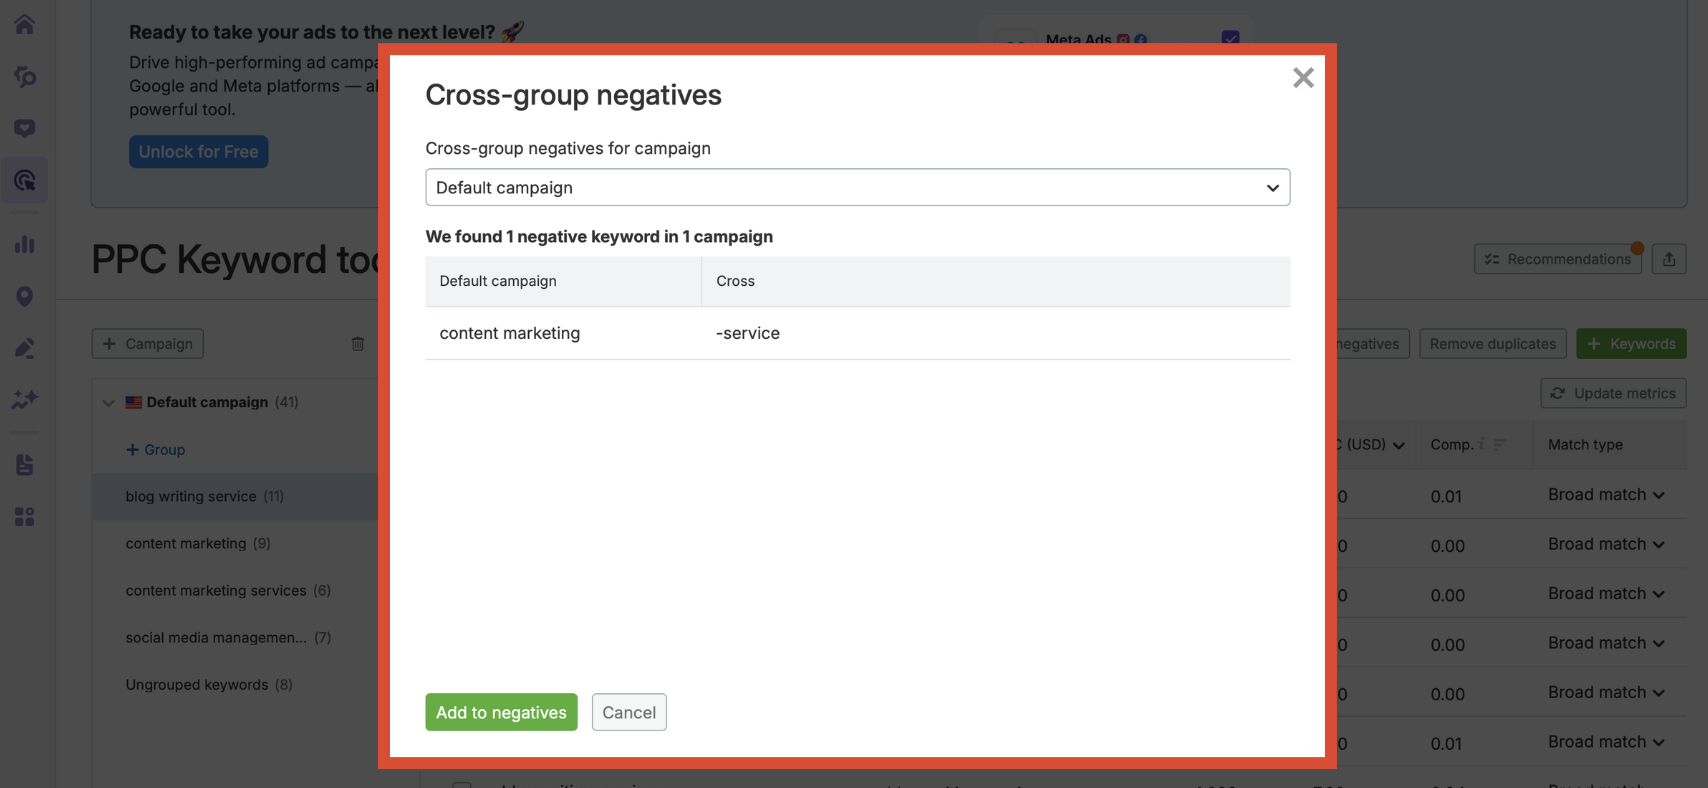
Cross-group Negatives
When the same or similar keywords exist in multiple ad groups, your ads can compete with each other. This leads to inflated costs and a drop in Quality Score.
Click the Cross-group negatives button.
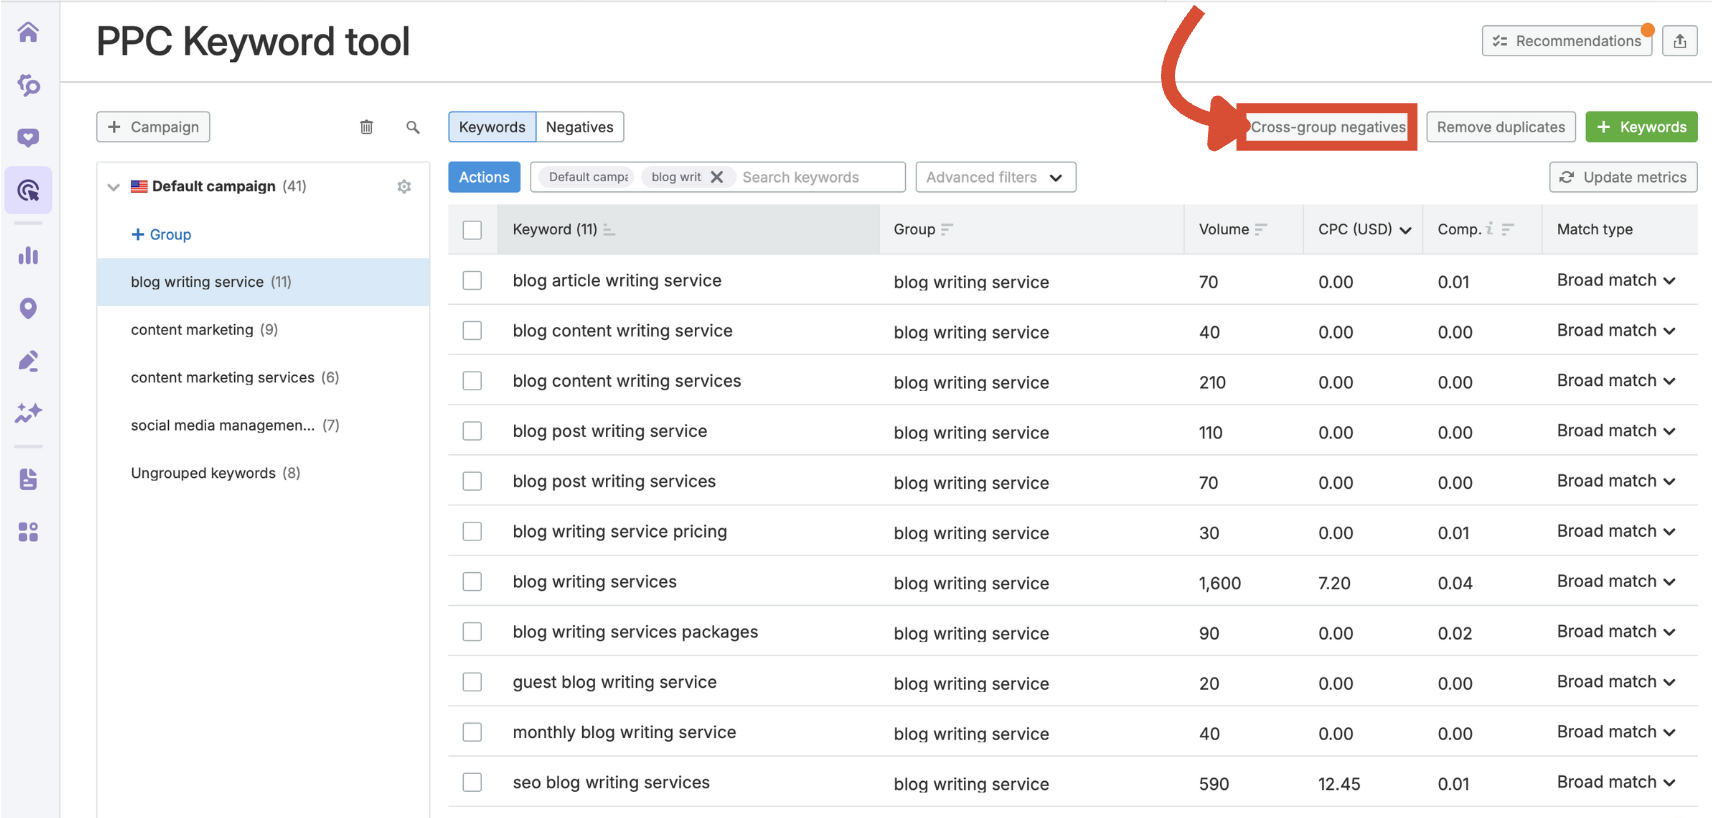
This identifies potential conflicts and allows you to apply the correct negative keywords to the right ad groups.
Update Metrics
Keyword data can change over time. To make sure your planning reflects the most accurate information, click Update metrics.
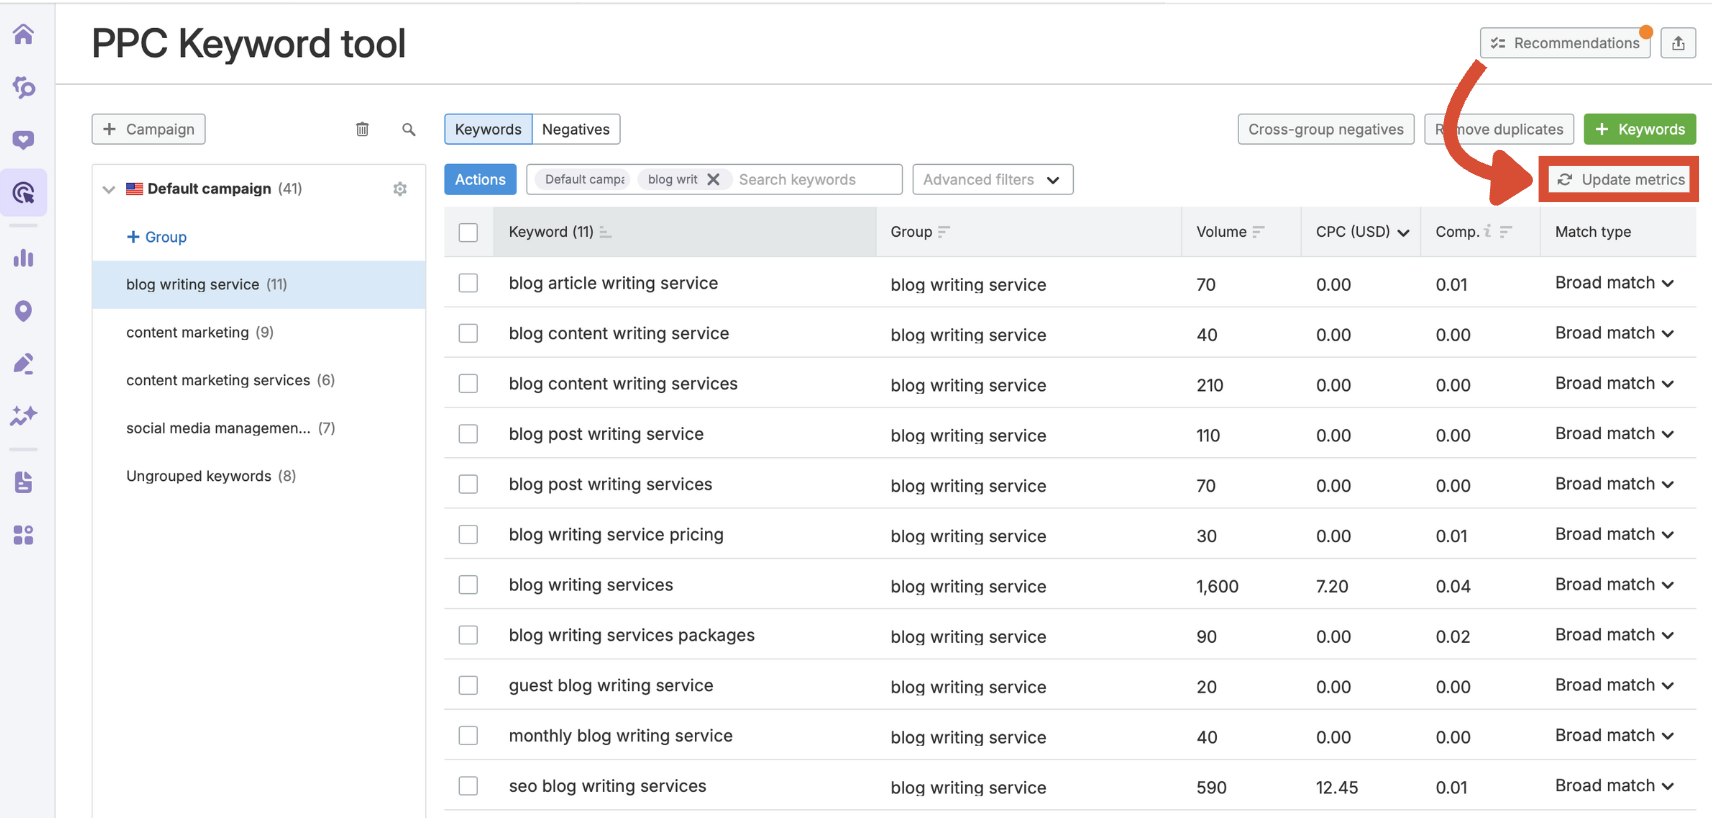
Use this before launching or editing a campaign to ensure you’re basing decisions on current insights.
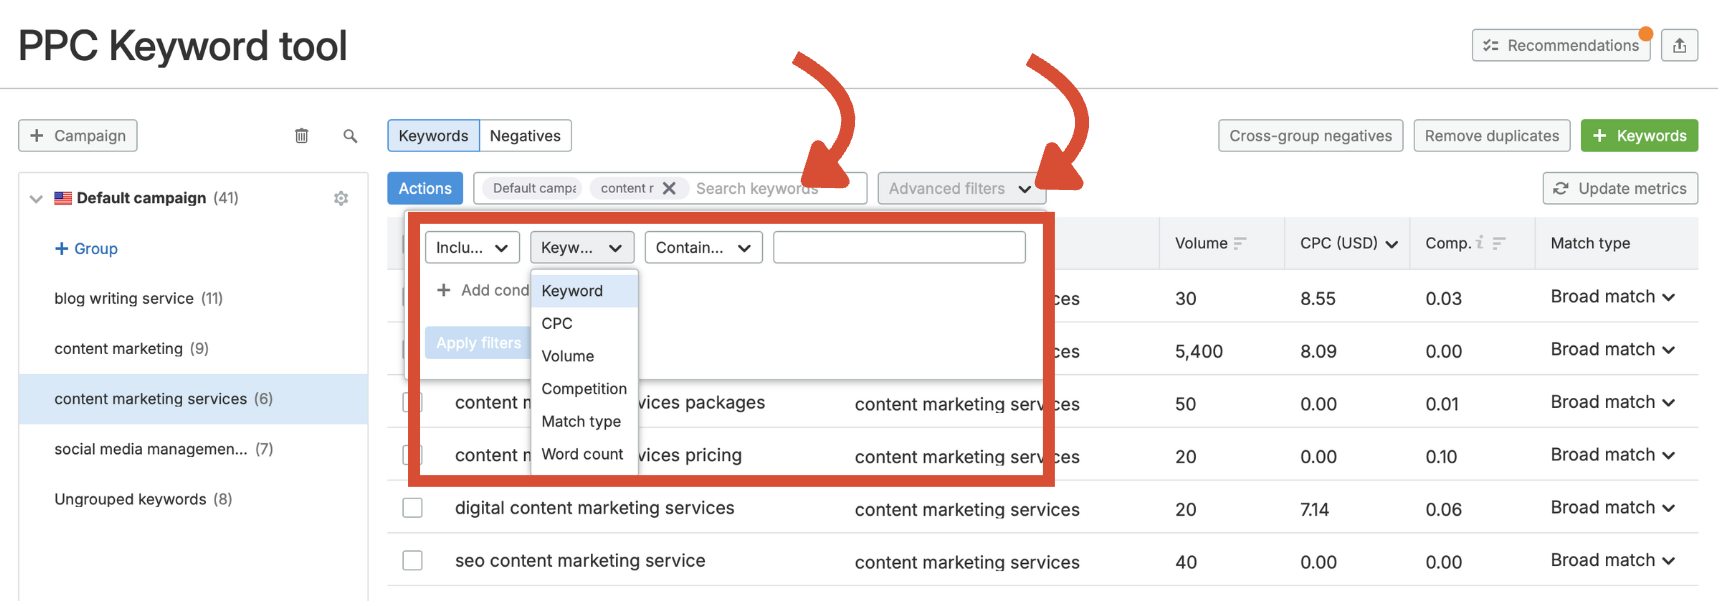
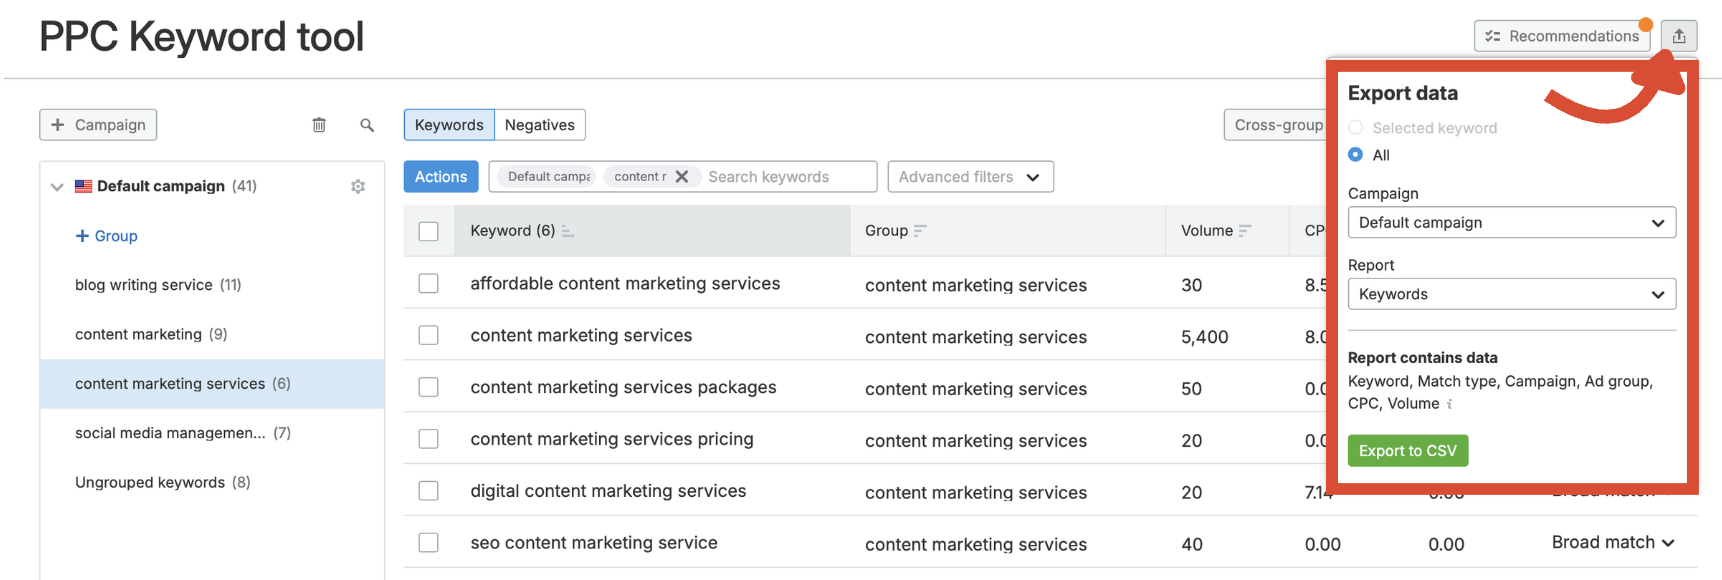
Step 4: Filter, Sort, and Export
Use the advanced filters drop-down to isolate keywords by keyword, CPC, volume, competition, match type, or word count. You can also use the search bar to find terms containing specific words.
To sort your keyword table, click the sort icons in the table headers.
- Sort by Keyword to alphabetize terms
- Sort by Group to evaluate structure
- Sort by Volume to find high-traffic opportunities
- Sort by Comp. to assess competition level
When you're ready to upload your campaigns to Google Ads, click the Export button in the top right to generate a CSV file.
Build on Your Campaign Structure
The PPC Keyword Tool brings clarity to your Google Ads campaign structure and ensures your targeting is precise from the start. This process is just one part of the broader Advertising Toolkit from Semrush, which offers end-to-end support for building, optimizing, and scaling paid campaigns.
Now you’ve laid the groundwork, it’s time to refine it. Let’s move on to Recommendations and sharpen your strategy even further.